Showing posts with label SSMS. Show all posts

Wednesday, July 2, 2014

Use Central Management Servers to Alter a Column in All Servers

The "Central Management Servers" functionality of SQL Server Management Studio is an excellent way to apply the same code to every server. By "every server", I mean groups of servers that you define: you might have different servers in folders named "Production", "Development", "QA", "SQL Server 2000", etc. It just depends on your needs.

To get to the "Central Management Servers" pane in SSMS, simply select the "View, Registered Servers" menu item. After you've set up your servers, you can execute queries against every database in every server. The example below changes the width of a column in a table. Note that in this example, we look for only databases whose name begins with "DB100", we exclude read-only databases, and we specify the schema, table, and column name we want to modify. The code also checks that the length isn't already set to the value we want, to avoid unnecessary noise in the output. This code is compatible with SQL Server 2000 and later (hence the use of "syscolumns", etc.)

-- Comment. 
set nocount on
declare @Sql nvarchar(4000)

set @Sql = 'use [?]

            if exists (select *
                         from syscolumns   sc
                         join sysobjects   so
                           on sc.id = so.id
                        where ''?''                                   like ''DB100%''
                          and databaseproperty(''?'', ''IsReadOnly'')    = 0
                          and user_name(so.uid)                          = ''dbo''
                          and object_name(sc.id)                         = ''Customer''
                          and sc.name                                    = ''FirstName''
                          and sc.length                                 != 120)
            begin
                select ''?'', sc.length
                  from syscolumns   sc
                  join sysobjects   so
                    on sc.id = so.id
                 where ''?''                                   like ''DB100%''
                   and databaseproperty(''?'', ''IsReadOnly'')    = 0
                   and user_name(so.uid)                          = ''dbo''
                   and object_name(sc.id)                         = ''Customer''
                   and sc.name                                    = ''FirstName''
                   and sc.length                                 != 120

                ALTER TABLE dbo.Customer ALTER COLUMN FirstName VARCHAR(120) NULL
            end '

exec sp_msforeachdb @Sql
go

References

For more information on Central Management Servers:

     Create a Central Management Server and Server Group

     Registered Servers and Central Management Server Stores

     Execute SQL Server query on multiple servers at the same time

Friday, June 7, 2013

SSMS 2012 - Lines with Background Color Have Ugly Gaps

I've been using SQL Server Management Studio 2012 for about 10 minutes now, so I don't have much to say about it yet. I'm sure it's a big improvement over previous versions, and I'm looking forward to exploring.

So what's the problem? It's trivial, really, but at the same time, just so glaringly ugly. I set my T-SQL comments to have a background color. For me, it's easier to "filter out" the non-executing part of the code that way. It also makes it possible to "section off" my code for clarity; splitting a long script into chunks makes it much more digestable. Here's an example using SSMS 2008:


See how the comments form one cohesive block of color? Smarter people than me could tell you why this is psycho-visually important. I just know that it is important. So imagine my dismay when I opened my first SQL file in SSMS 2012 and saw this (click on the image to get the full-size version):


Each comment line is now separated by a thin stripe of background color, in my case black. (And yes, it looks the same with a white background.) Who at Microsoft thought this monstrosity was acceptable? The only Connect I could find on it is at http://connect.microsoft.com/VisualStudio/feedback/details/645507/syntax-highligher-issues and it's been marked as "Closed Won't Fix," which is the kind of response that reminds me why I'm not a full-time a C/C++/C# developer anymore.

I know, it's a little thing, but a closer look at these lines reveals that someone put some work into creating this gap: it wasn't just accidental. Look closely at the line above the black gap in the zoomed-in image below:


You can see that the color of the line above the gap is blended with the background color, which, I suppose, gives it a more appealing look (assuming that you like the background lines in the first place). This touch is obviously someone's handiwork, which probably explains why they're not interested in fixing it. I guess now I just need to either live it with, stop coloring comments differently, or find a workaround somewhere.

Thursday, August 4, 2011

"Select Top 1000 Rows" Doesn't Show SPARSE Columns?

A colleague pointed out something I'd never noticed about SQL Server Management Studio's (SSMS) "Select Top 1000 Rows" feature: it doesn't display SPARSE columns. This is not a bug, but rather by design: SQL Server tables can have up to 30,000 SPARSE columns: imagine the issues with viewing thousands of columns at a time!


The annoying thing, however, is that no matter how few columns a table has, not even a single SPARSE column will be displayed. To workaround this limitation, I've written a script that creates views for all tables with SPARSE columns. Since views don't suffer from this limitation in SSMS, you can use "Select Top 1000 Rows" on them to effectively see all the columns on the table.

I personally run it as a "startup script", just to semi-automate the maintenance of re-creating the views when tables change over time, but it could just a easily be set to run as a SQL Agent Job, or manually if desired.

-------------------------------------------------------------------------------
-- Declare variables.                                                          
-------------------------------------------------------------------------------

DECLARE @Prefix     NVARCHAR(50)  = '_'
DECLARE @Suffix     NVARCHAR(50)  = '_SPARSE'
DECLARE @SchemaName sysname       = ''
DECLARE @TableName  sysname       = ''
DECLARE @ViewName   sysname       = ''
DECLARE @Sql        NVARCHAR(MAX) = ''


-------------------------------------------------------------------------------
-- Since tables can be added, modified, and deleted, start with a clean slate. 
-------------------------------------------------------------------------------

DECLARE cur CURSOR FOR
    SELECT SCHEMA_NAME(schema_id)   AS 'SchemaName'
         , name                     AS 'TableName'
     FROM sys.views
    WHERE is_ms_shipped = 0 
      AND name LIKE '%' + @Suffix ESCAPE '$'

OPEN cur
FETCH NEXT FROM cur INTO @SchemaName, @TableName

WHILE @@FETCH_STATUS = 0
BEGIN
    SET @ViewName = QUOTENAME(@SchemaName) + '.' + QUOTENAME(@TableName)

    IF OBJECT_ID(@SchemaName, @ViewName) IS NULL
    BEGIN        
        SET @Sql = 'DROP VIEW ' + @ViewName
        EXEC sys.sp_executesql @Sql 
    END

    FETCH NEXT FROM cur INTO @SchemaName, @TableName
END

CLOSE cur
DEALLOCATE cur


-------------------------------------------------------------------------------
-- Iterate through all tables and create view for those with SPARSE columns.   
-------------------------------------------------------------------------------

DECLARE cur CURSOR FOR
    SELECT DISTINCT SCHEMA_NAME(t.schema_id)   AS 'SchemaName'
                  , t.name                     AS 'TableName'
     FROM sys.tables    t
     JOIN sys.columns   c
       ON t.object_id = c.
       object_id
    WHERE t.type_desc     = 'USER_TABLE'
      AND t.is_ms_shipped = 0 
      AND c.is_sparse     = 1

OPEN cur
FETCH NEXT FROM cur INTO @SchemaName, @TableName

WHILE @@FETCH_STATUS = 0
BEGIN
    SET @ViewName  = QUOTENAME(@SchemaName) + '.' + QUOTENAME(@Prefix + @TableName + @Suffix)
    SET @TableName = QUOTENAME(@SchemaName) + '.' + QUOTENAME(@TableName)
    
    IF OBJECT_ID(@SchemaName, @ViewName) IS NULL
    BEGIN        
        SET @Sql = 'CREATE VIEW ' + @ViewName + ' AS  SELECT * FROM ' + @TableName
        EXEC sys.sp_executesql @Sql 
    END

    FETCH NEXT FROM cur INTO @SchemaName, @TableName
END

CLOSE cur
DEALLOCATE cur

Once the above code has been run, any tables you have with SPARSE columns will have views created for them. (If you don't happen to have any, here's some code to create a small test table.)

SET NOCOUNT ON

-------------------------------------------------------------------------------
-- Set up test table.                                                          
-------------------------------------------------------------------------------

IF OBJECT_ID('MyTable') IS NOT NULL
    DROP TABLE MyTable

SET ANSI_NULLS ON
SET QUOTED_IDENTIFIER ON
GO

CREATE TABLE MyTable
(
    TableID            INT                  NOT NULL,
    MySparseColumn     NVARCHAR (50) SPARSE     NULL,
    MyNonSparseColumn  NVARCHAR (50)        NOT NULL
)

GO

INSERT MyTable (TableID, MySparseColumn, MyNonSparseColumn)
VALUES (1, NULL, 'ABC')

GO 10

Once you've got the views created, simply use the "Select Top 1000 Rows" feature as usual, and you'll be able to see all the columns in your tables...

... even the SPARSE ones.

Monday, April 25, 2011

How to Hide Metadata Information Using Extended Properties

Ok, a more honest title for this post might be, 'How to Clean Up the Mess After You've Hosed the Extended Properties on Primary Key Constraints', but that wouldn't fit.

What I was trying to accomplish is a topic for another post. But while grumbling loudly while writing the code to fix what I had inadvertently done, I realized it could be used to "hide" information about tables. I say "hide", in quotes, because anyone with access to Books Online could find it easily. This is really just a way of storing information about tables, and not having it appear in SQL Server Management Studio (SSMS).

What I ran into involves the difference between primary key constraints and primary key indexes. The most important distinction between them is "existence"; there's no such thing as a primary key index. If you're confused, keep reading. If you've heard this story already, skip ahead a bit. Simply put, when someone is talking about "primary key indexes", they're using verbal shorthand for, "the index that the primary key constraint uses to enforce uniqueness." (As far as I know, this kind of index has no specific name, which is good, because if if did, we'd all confuse it with "primary key constraint", so we'd be in the same boat we are now, but without the ability to abruptly clarify things by saying, "but there's no such thing as a whatever-it-is." We should count our blessings.) To sum up, when it comes to primary keys, we have a "primary key constraint", and a unique index of some sort to help it. (We won't be getting into the whole clustered vs. non-clustered thing here.)

Now we're ready to talk about setting extended properties on primary key constraints. First we create a little test table:

CREATE TABLE MyTable
(
    MyPkColumn INT NOT NULL,
    CONSTRAINT PK_MyTable PRIMARY KEY (MyPkColumn) 
) 

And now we add an extended property to the PK_MyTable constraint, as so:

EXEC sys.sp_addextendedproperty 
    @name       = N'Extended property for PK_MyTable constraint'
  , @value      = N'This is the PK for MyTable'
  , @level0type = N'SCHEMA'
  , @level0name = N'dbo'
  , @level1type = N'TABLE'
  , @level1name = N'MyTable'
  , @level2type = N'CONSTRAINT'
  , @level2name = N'PK_MyTable'

Once added, this extended property will appear in SSMS, as expected. Oddly, it appears on the index-the-primary-key-constraint-uses, not on the constraint itself. (And no, I'm not suggesting you create tables in the master database.) So far, so good. But given that the "slot" for the index is already taken, and knowing what we do about about the non-existence of "primary key indexes", what happens if we do this?

EXEC sys.sp_addextendedproperty 
    @name       = N'Secret extended property for PK_MyTable index'
  , @value      = N'This is the PK index for MyTable'
  , @level0type = N'SCHEMA'
  , @level0name = N'dbo'
  , @level1type = N'TABLE'
  , @level1name = N'MyTable'
  , @level2type = N'INDEX'
  , @level2name = N'PK_MyTable'

Ideally (I think anyway) this should generate an error: we're adding an extended property to a CONSTRAINT, but setting @level2name to INDEX. What it actually does is create the extended property as if there really were such a thing as a "primary key index". Interestingly, but perhaps not surprisingly, this new extended property doesn't show up (at least not anywhere I can find) in SSMS. So how do we know it's there? We use the system views, of course!

-- Emit code to drop all extended properties on "primary key indexes". 

SELECT ep.major_id
     , ep.minor_id
     , s.name           AS 'Schema Name'
     , t.name           AS 'Table Name'
     , i.name           AS 'Index Name'
     , ep.name          AS 'EP Name'
     , ep.value         AS 'EP Value'
       
     , 'USE ' + DB_NAME() + '   ' +
       'EXEC sys.sp_dropextendedproperty '
            + '@name = '                                 +  '''' +  ep.name  + ''', '
            + '@level0type = ''SCHEMA'', @level0name = ' + quotename(s.name) + ', ' 
            + '@level1type = ''TABLE'',  @level1name = ' + quotename(t.name) + ', '
            + '@level2type = ''INDEX'',  @level2name = ' + quotename(i.name)   AS 'T-SQL'

  FROM sys.extended_properties    ep
  JOIN sys.indexes                i
    ON ep.major_id = i.object_id
   AND ep.minor_id = i.index_id
  JOIN sys.tables                 t
    ON i.object_id = t.object_id
  JOIN sys.schemas                s
    ON t.schema_id = s.schema_id
 WHERE ep.class_desc    = 'INDEX'
   AND i.is_primary_key = 1
 ORDER BY s.name, t.name, i.name, ep.name

The above displays the offending extended properties on the current database; the last column contains the code necessary to drop each one; for example:

EXEC sys.sp_dropextendedproperty 
    @name       = 'Secret extended property for PK_MyTable index', 
    @level0type = 'SCHEMA', 
    @level0name = [dbo], 
    @level1type = 'TABLE',  
    @level1name = [MyTable], 
    @level2type = 'INDEX',  
    @level2name = [PK_MyTable]
 

Additional Reading

Monday, March 15, 2010

Using SSMS Templates for Fun and Profit!

The "best practices" concept is truly a great thing, especially when applied to T-SQL code. But does your best practices process amount to (a) carefully writing down the things you know you should do, and then (b) not having time to do them? If so, my next few posts will describe an easy way to capture and re-use your T-SQL best practices, saving time, improving code, and reducing bugs. No, really.

In this post, I'll walk through how to use one of the least-appreciated features of SQL Server Management Studio: the "Template Library." Future posts will teach you how to leverage SSMS Templates to create a flexible, personal "toolbox" of your debugged, error-checked, optimized, commented, and otherwise perfected T-SQL code snippets. (Post hoc: You can now download my library of templates from http://sqlsoundings.blogspot.com/p/sql-server-templates.html )

What's a Template?

Templates are simply Notepad-editable text files that have an "sql" extension: "SQL scripts", in other words. What makes them special is that they contain zero or more parameters, and reside in certain "well-known" folders.

Ok, What's a Parameter?

This is one of those things that's easier to demonstrate than explain. Here's a very simple line of code with a parameter in it:

DROP TABLE <table_name, sysname, your_table_name>

As you can see, a parameter is just a parameter_name, a data_type, and a default_value, surrounded by angle brackets. Actually, it's even easier than that: the parameter_name can be made readable by using upper- and lower-case letters, spaces, and (most) punctuation; the data_type doesn't actually do anything; and the default_value is optional. So this is also a legal parameter:

DROP TABLE <Table Name,,>

Of course, including a default_value is usually a good idea, if only to jog your memory. Even better, since data_type doesn't do anything (I call this "meekly"-typed), we could conceivably use it for documentation:

DROP TABLE <Table Name, Must begin with "tbl"!, tbl>

So far, using Templates might look like more work than it's worth. And it might be, except... Microsoft has written a bunch of them for you!

So How do I Use a Template?
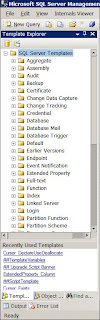
To see the available Microsoft-authored Templates, we use the "Template Explorer" window, via the "View, Template Explorer" menu item. The familiar tree-of-folders-and-files control appears, with the Templates arranged into folders based on database object type. For example, here's the Create Unique Nonclustered Index Template from the Index folder:

-- ===================================
-- Create Unique Nonclustered Index
-- ===================================
USE <database_name, sysname, AdventureWorks>
GO

CREATE UNIQUE NONCLUSTERED INDEX <index_name,sysname,AK_EmployeeAddress_rowguid> 
ON <schema_name,sysname,HumanResources>.<table_name,sysname,EmployeeAddress> 
(
 <column_name,sysname,rowguid> ASC
)
WITH 
(
 SORT_IN_TEMPDB = OFF, 
 DROP_EXISTING = OFF
) 
ON <file_group,,[PRIMARY]>
GO

EXEC sys.sp_addextendedproperty 
 @name=N'MS_Description', 
 @value=N'<description_index,string,Description of index>' ,
 @level0type=N'SCHEMA', 
 @level0name=N'<schema_name,sysname,HumanResources>', 
 @level1type=N'TABLE', 
 @level1name=N'<table_name,sysname,EmployeeAddress>', 
 @level2type=N'INDEX', 
 @level2name=N'<index_name,sysname,AK_EmployeeAddress_rowguid>'
GO

As you can see, there are several parameters in this Template; if there's a limit, I've never run into it. It's important to understand that the parameters describe simple text-replacement: they know nothing of T-SQL. This means they can be used to parameterize anything: database object names, text inside quotes, text in comments, portions of object names, fragments of T-SQL code, etc.

Let's see how you use this Template to create a unique nonclustered index. First, open a new (or existing) SQL file. Now drag-and-drop the Create Unique Nonclustered Index Template from the Index folder to the desired location in the editor window; this pastes the Template's contents at the drop location.

Now comes the fun part: press the Ctrl-Shift-M chord, or use the Query, Specify Values for Template Parameters menu item. This will cause SSMS to pop this dialog:

This dialog is what makes Templates so useful. There's one row for each parameter, and the columns are the variable name, data_type, and default_value for each one. To replace all the parameters in your SQL document, you enter values (or accept the defaults) for each row. (Naturally, the left and center columns in this dialog are read-only.) Once you're happy with the values you've entered, click the "OK" button, and they will be substituted for the Template parameters, resulting in T-SQL code like:

-- ===================================
-- Create Unique Nonclustered Index
-- ===================================
USE AdventureWorks
GO

CREATE UNIQUE NONCLUSTERED INDEX AK_EmployeeAddress_rowguid 
ON HumanResources.EmployeeAddress 
(
 rowguid ASC
)
WITH 
(
 SORT_IN_TEMPDB = OFF, 
 DROP_EXISTING = OFF
) 
ON [PRIMARY]
GO

EXEC sys.sp_addextendedproperty 
 @name=N'MS_Description', 
 @value=N'Supports the Employee Address Report for Marketing - see Pam for details' ,
 @level0type=N'SCHEMA', 
 @level0name=N'HumanResources', 
 @level1type=N'TABLE', 
 @level1name=N'EmployeeAddress', 
 @level2type=N'INDEX', 
 @level2name=N'AK_EmployeeAddress_rowguid'
GO

Some things to note about this dialog box:

  • Each variable-name appears once, no matter how many times it's used in the Template's T-SQL code.
  • Don't allow two parameters to have the same variable-name but different data-types, because it won't work: only the first parameter for a variable-name appears in the dialog.
  • You can use the tab key to navigate, but it's faster to use the down arrow after entering each value.
  • Drag-and-dropping copies the contents of the Template to the editor window.
  • Double-clicking opens a new window, and copies the contents of the Template to the editor window. However, this is not how you edit a Template.
  • To edit a Template, right-click on it, and select the "Edit" menu item.
  • This is, for some reason, a modal dialog, so be sure to have whatever text you need available to you (on the clipboard, in an open text file, etc.) before popping it.
  • Be sure not to use extra commas or angle brackets in a parameter, as this usually confuses the parser.

Where are the Templates?

This can be a little confusing because of the way SSMS behaves. There are two locations for the Microsoft-authored Templates: a "factory-installed" one for SSMS to use, and a user-specific one:

  • The original, "factory-installed" copies can be found in C:\Program Files\Microsoft SQL Server\100\Tools\Binn\VSShell\Common7\IDE\SqlWorkbenchProjectItems\Sql for SQL Server 2008, or in C:\Program Files\Microsoft SQL Server\90\Tools\Binn\VSShell\Common7\IDE\SqlWorkbenchProjectItems\Sql for SQL Server 2005. The Templates in these folders cannot be changed via SSMS; they will always be preserved in their original state.
  • The location of the local, user-specific copies depends on your version of SQL Server and your operating system. Using the %APPDATA% Windows environment variable (which makes it operating system independent), and knowing that SQL Server 2005 is "version 9", and "SQL Server 2008" is "version 10", we can represent the local Template folder's name compactly as:
    %APPDATA%\Microsoft\Microsoft SQL Server\{SQL Version}0\Tools\Shell\Templates\Sql
    

The difficult thing to remember (for me, at least) is that what you're seeing in the "Template Explorer" window is your local files, not the original ones. So, edits to the these Templates will be saved to your local Template folder.

Every time it runs, SSMS makes sure that each user has a copy of some kind of all the Microsoft-authored Templates. It does this by comparing the files and folders in the original folder to each user-specific folder. If it finds any missing in the user-specific folder, it copies them from the original folder.

The trick is that the comparison is on existence only: the actual contents of the files are not examined. This allows SSMS to install (and repair) from the original Templates, but also lets the use modify their local copies without SSMS overwriting them with original files at the next program run.

So, if you edit a Template, your changes will remain forever. But, if you delete a Template, you'll find it's re-appeared at the next program run. (If you delete both the original and local Templates - which you should not do - SSMS won't be able to perform this copy, because it won't be able to find the file.)

Conclusion

Using SSMS Templates is less error prone than typing code by hand, faster than using the GUI, and makes it possible to add documentation while it's still fresh in your mind. The only thing better would be if you could create your own Templates. That will be the subject of a future post.